 The Google Translation Widget Looks Ugly In My Opinion(screenshot). Because Of The Bottom Right Aligned Gadget Powered By Google Text Link. So Its Time To Have A Modified Google Translation Widget For Your Blogger Blog. It Looks Nice And Simple.
This Widget Works With The Extracted Codes From The Google Translation Widget. Therefore The Output You Gets From Both Of The Widgets Will Be Same. Click To See The Example
Lets Start The Widget Installation...
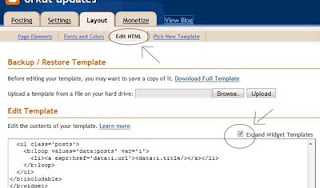
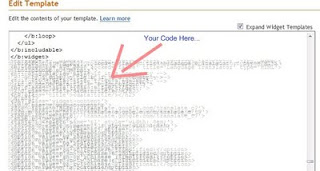
* Go To The Layout Section Of Your Blogger Blog, And Select Edit HTML , Check Expand Widget Templates Is Ticked
 note: For Backing Up Your Current Code Click Download Full Template On The Backup/Restore Template Section.
* Then Click On SAVE TEMPLATE
* Go To Layout --> Page Elements , There You Could See Your New Translation Widget's Current Position On Your Blog, You Could Simply Change The Widget Position By Dragging It To The Position You Need. After Placing Your Widget Click Save.
Advanced Users Corner...
* This Widget Is Designed For The Bloggers Who Writes In English, Bloggers Who Writes In Other Languages Should Make Some Changes In The Widget Code.ie, Bloggers Who Writes In Arabic Should Find And Change The Following Code From The Original Widget Code.
Change <option selected='en' value='vi'>English</option>
To <option selected='ar' value='vi'>Arabic</option>
And Also Change
<input name='sl' type='hidden' value='en'/>
To
<input name='sl' type='hidden' value='ar'/>
* For Changing The Word "Go" To Your Language Or Something Else, Find And Edit The Following Code.
<input style='width: auto;' type='submit' value='Go'/>
* If You Want Any Part Of Your Blog Post Remain Untranslated After The Conversion Do The Following
<span class='notranslate'>The Text Which Has To Remain Untranslated.</span>
alsoread: Add Favicon For Your Blog


